

Key Takeaways
Option A
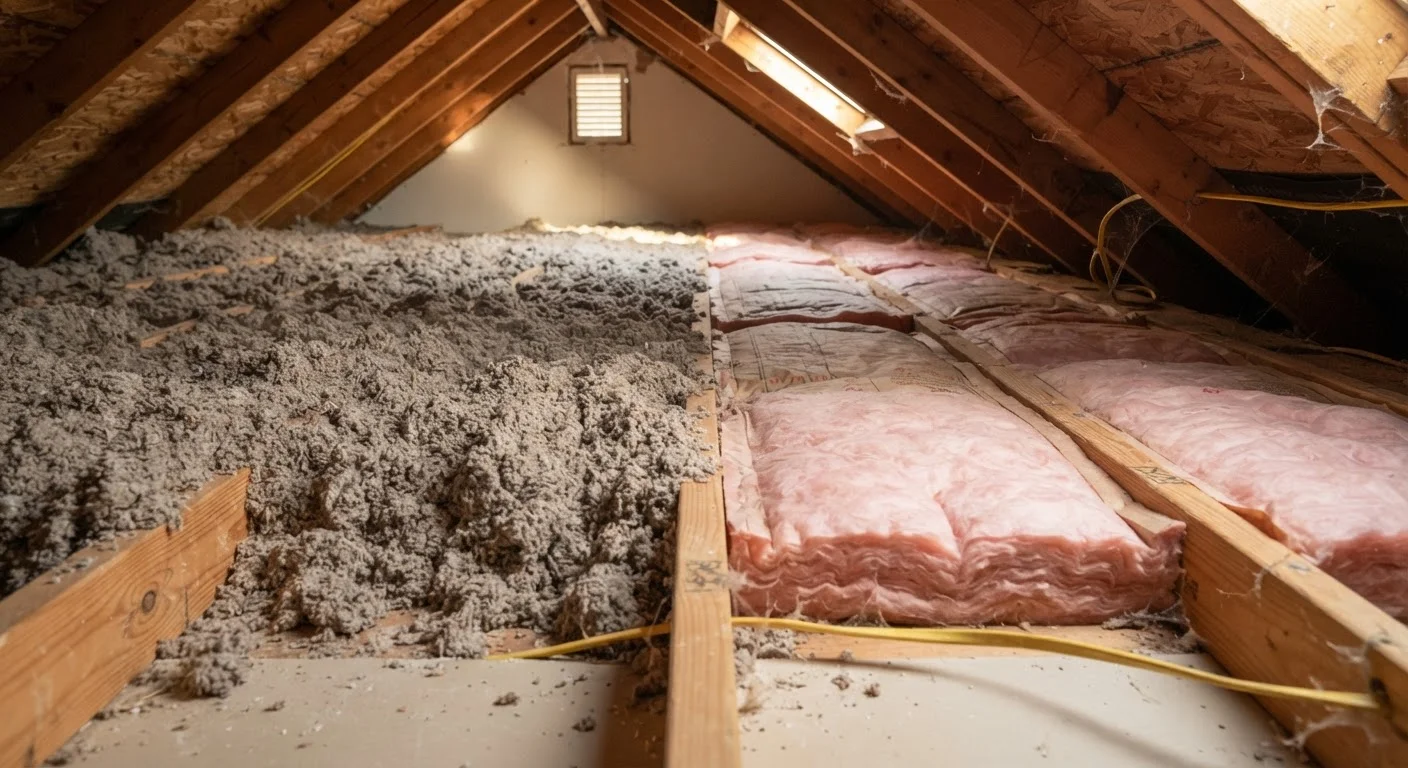
Blown-in insulation
The gap-filling choice for tight and irregular spaces.
Best for: Older homes with finished walls, irregular framing, or hard-to-reach attic cavities that batts cannot cover cleanly.
Option B
Batt insulation
The straightforward option for open, standard framing.
Best for: New additions, accessible attic floors, or any space with consistent stud or joist spacing and easy access.
If your older home has finished walls with little or no existing insulation
Blown-in insulation
A contractor can drill small holes and blow material into wall cavities without opening up drywall, which saves significant money on demolition and repair.
If you are insulating an open, unfinished attic floor yourself
Batt insulation
Batts are easy to cut and lay between joists, require no special equipment, and work well when joist spacing is consistent and the area is accessible.
If your attic already has some insulation that has settled or thinned over time
Blown-in insulation
Blown-in material adds depth evenly over existing coverage, filling low spots without removing what is already there.
If you are adding a room addition or finishing a basement with exposed framing
Batt insulation
Open stud bays in new framing are the scenario batts are designed for, and the job is manageable for a capable DIYer on a tight budget.
Why insulation type matters more in older homes
Homes built before the 1980s were often constructed with little attention to insulation standards that are common today. Framing members were sometimes irregular, cavities were left empty, and settling over decades has compressed whatever material was originally installed. Choosing the wrong insulation type for these conditions means money spent without the energy savings expected.
The core question is access. If walls and cavities are open, either type can work. If they are closed up, the choice narrows quickly. Understanding how each material behaves in real conditions, rather than just comparing R-value numbers on a label, is what leads to a result that actually lowers heating and cooling costs.
| Criterion | Blown-in insulation | Batt insulation |
|---|---|---|
| Best application | Closed walls, irregular cavities, attic topping | Open framing with standard spacing |
| DIY accessibility | Moderate (attics); harder for walls | High for open, accessible spaces |
| Equipment needed | Blower machine (rent or hire) | Utility knife, staple gun |
| Handles irregular framing | Yes, fills around obstacles | Poorly, gaps reduce R-value |
| Upfront material cost | Moderate | Lower |
| Coverage of settled areas | Good, adds depth evenly | Limited, batts do not fill voids |
| Common materials | Cellulose, fiberglass | Fiberglass, mineral wool |
How blown-in insulation works
Blown-in insulation, sometimes called loose-fill, is made from either cellulose (recycled paper fiber treated for fire resistance) or fiberglass. A machine shreds or loosens the material, and a hose carries it into the space being insulated. The material settles and conforms to whatever shape it encounters, which is its main practical advantage.
In an older home, this matters because wall cavities may contain old blocking, pipes, or irregular framing that would leave gaps around a rigid batt. Blown-in material works around those obstacles. For finished walls, a contractor drills small holes between each stud bay, fills the cavity, then patches the holes. This approach adds insulation without gutting the interior.
The limitation is equipment. A blower machine is required, which typically means renting one or hiring a professional. DIY blown-in kits exist for attics, and some home improvement retailers loan blower machines with a material purchase, but wall applications are generally better handled by someone with experience to avoid voids or overfilling.
How batt insulation works
Batt insulation comes in pre-cut panels or rolls, most commonly fiberglass or mineral wool (also called rock wool or slag wool). It is sized to fit standard 16-inch or 24-inch stud and joist spacing. A homeowner cuts it to length with a utility knife, fits it snugly into the bay, and staples a faced product in place or simply lays it in an attic floor cavity.
For a straightforward open-framing project, batts are genuinely DIY-friendly and carry no equipment rental cost. Mineral wool batts are denser, offer better sound control, and resist moisture better than fiberglass, though they cost more per square foot.
The problem in older homes is fit. Framing from the early 20th century often used different lumber dimensions, and stud spacing was not always consistent. A batt that does not fill its bay tightly loses R-value at the edges, which is exactly where air tends to move. Gaps from non-standard spacing are not a minor issue: they create thermal bridges that undercut the insulation's rated performance.
Air sealing: the step neither type can skip
Both blown-in and batt insulation slow heat transfer through mass, but neither seals air movement on its own. In an older home, gaps around electrical boxes, plumbing penetrations, and top plates are often the biggest source of heat loss. Insulation laid over or around those gaps without sealing them first still allows conditioned air to escape.
Before installing either type, use canned spray foam or caulk to seal any visible gaps in the area being insulated. In attics, pay particular attention to the tops of interior walls, where air from living spaces commonly moves into the attic. This step costs little but has a measurable effect on energy bills.
Local building codes in most states require permits for certain insulation projects, particularly if work involves changes to a vapor barrier or if the scope is part of a larger renovation. Check with your local building department before starting, and ask specifically whether the project requires inspection. A licensed contractor can also advise on local requirements.
This article is for general informational purposes only. For work involving electrical, structural, or other regulated systems, consult a licensed professional and verify local code requirements before beginning any project.